
Shopify will not let an unapproved payment gateway into its checkout. That one rule shapes every guide you will read on this, including this one, and knowing it up front saves you an afternoon hunting for a setting that does not exist.
What you can do, on every Shopify plan including Basic, is accept crypto payments on Shopify through a manual payment method. The customer picks it at checkout, the order arrives unpaid, and a payment link reaches them seconds later. When the coins confirm on-chain the order flips to paid on its own. No app store review, no approval queue, no monthly fee for the privilege.
The whole thing takes about twenty minutes. Ten steps, none of which need code or any understanding of a blockchain. Do it against the sandbox first, where the coins come from a faucet and mistakes cost nothing.
How to accept crypto payments on Shopify
Ten steps. Each one is a single action, with the trap under it where there is one. Nothing here needs code.
1. Create a free Oxialink account
Register at oxialink.com with an email you can open, and click the link in the verification email. Name, email and a password is the whole form; the company field is optional.
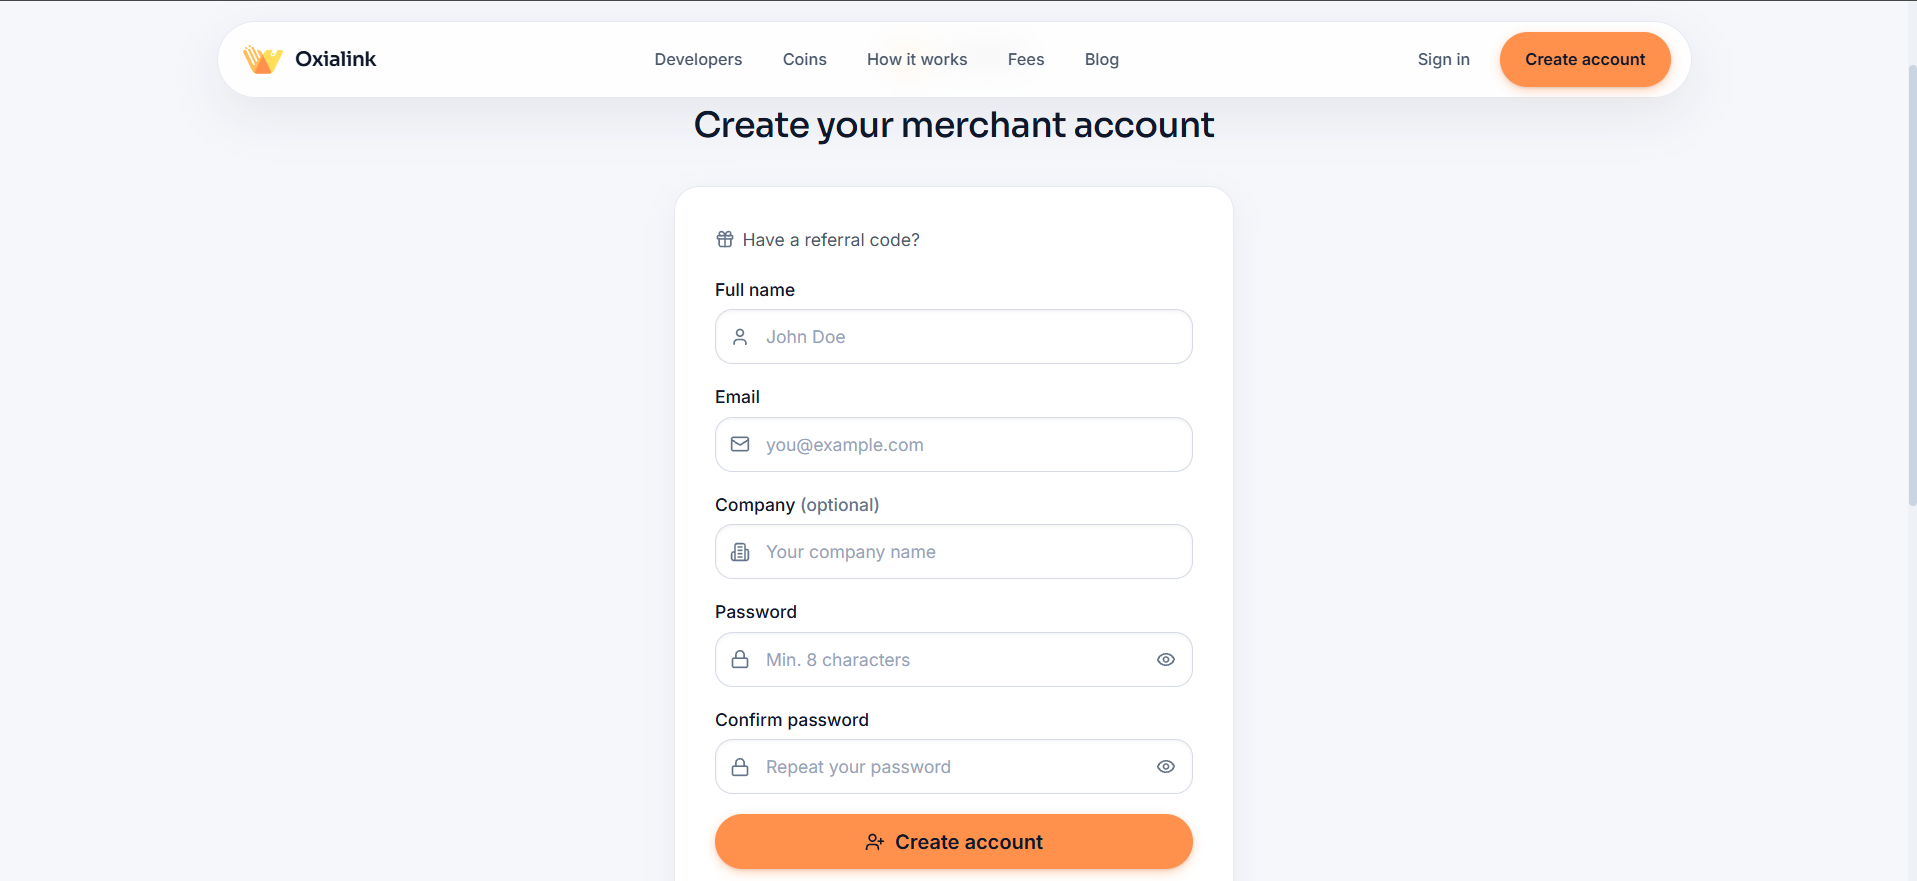
Watch out: an unverified account cannot issue API keys, so finish this before moving on. If you would rather rehearse without spending anything, register at sandbox.oxialink.com instead: same platform, public test networks, coins free from a faucet. Sandbox accounts are separate from live ones.
2. Create the wallet you want to be paid into
In Oxialink, open Wallets and add one for the coin you will settle in. A stablecoin on a cheap chain is the usual choice: USDT on TRON, BNB Smart Chain or TON. The full coin list shows what each costs to move.
Watch out: do this before you touch Shopify. A store connected to a coin you have no wallet for accepts orders and raises no payment links at all, and from the admin that looks like nothing happening.
3. Create the app in Shopify's Dev Dashboard
In Shopify: Settings, then Apps and sales channels, then Develop apps, then Build apps in Dev Dashboard. Press Create app, use the right-hand Start from Dev Dashboard panel, name it Oxialink, and create it.
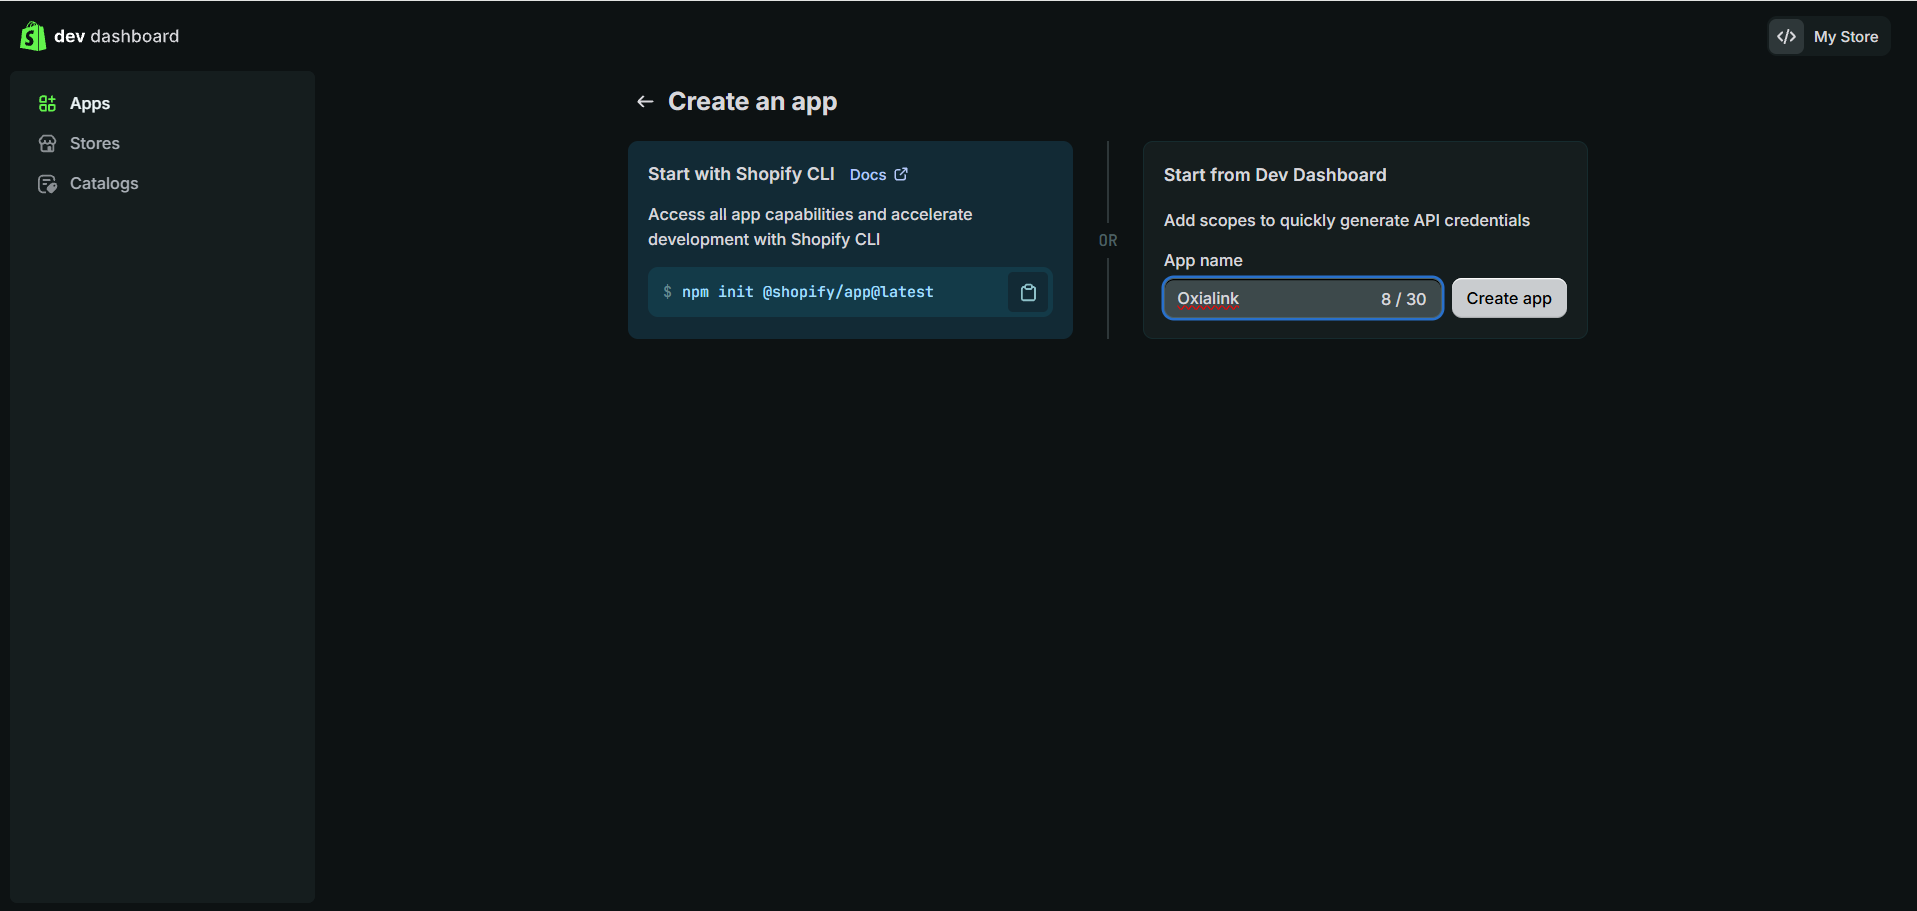
Watch out: there is no "Create an app" button in your admin any more. Shopify removed it on 1 January 2026, so any guide showing one was written before the change. Ignore the left-hand CLI panel; that starts a coding project you do not need.
4. Set the scopes and release the version
You land on a Create version screen. Change the App URL from https://example.com to https://oxialink.com and untick Embed app in Shopify admin. Scroll to API access and type this into the Scopes box:
read_orders,write_orders,read_customers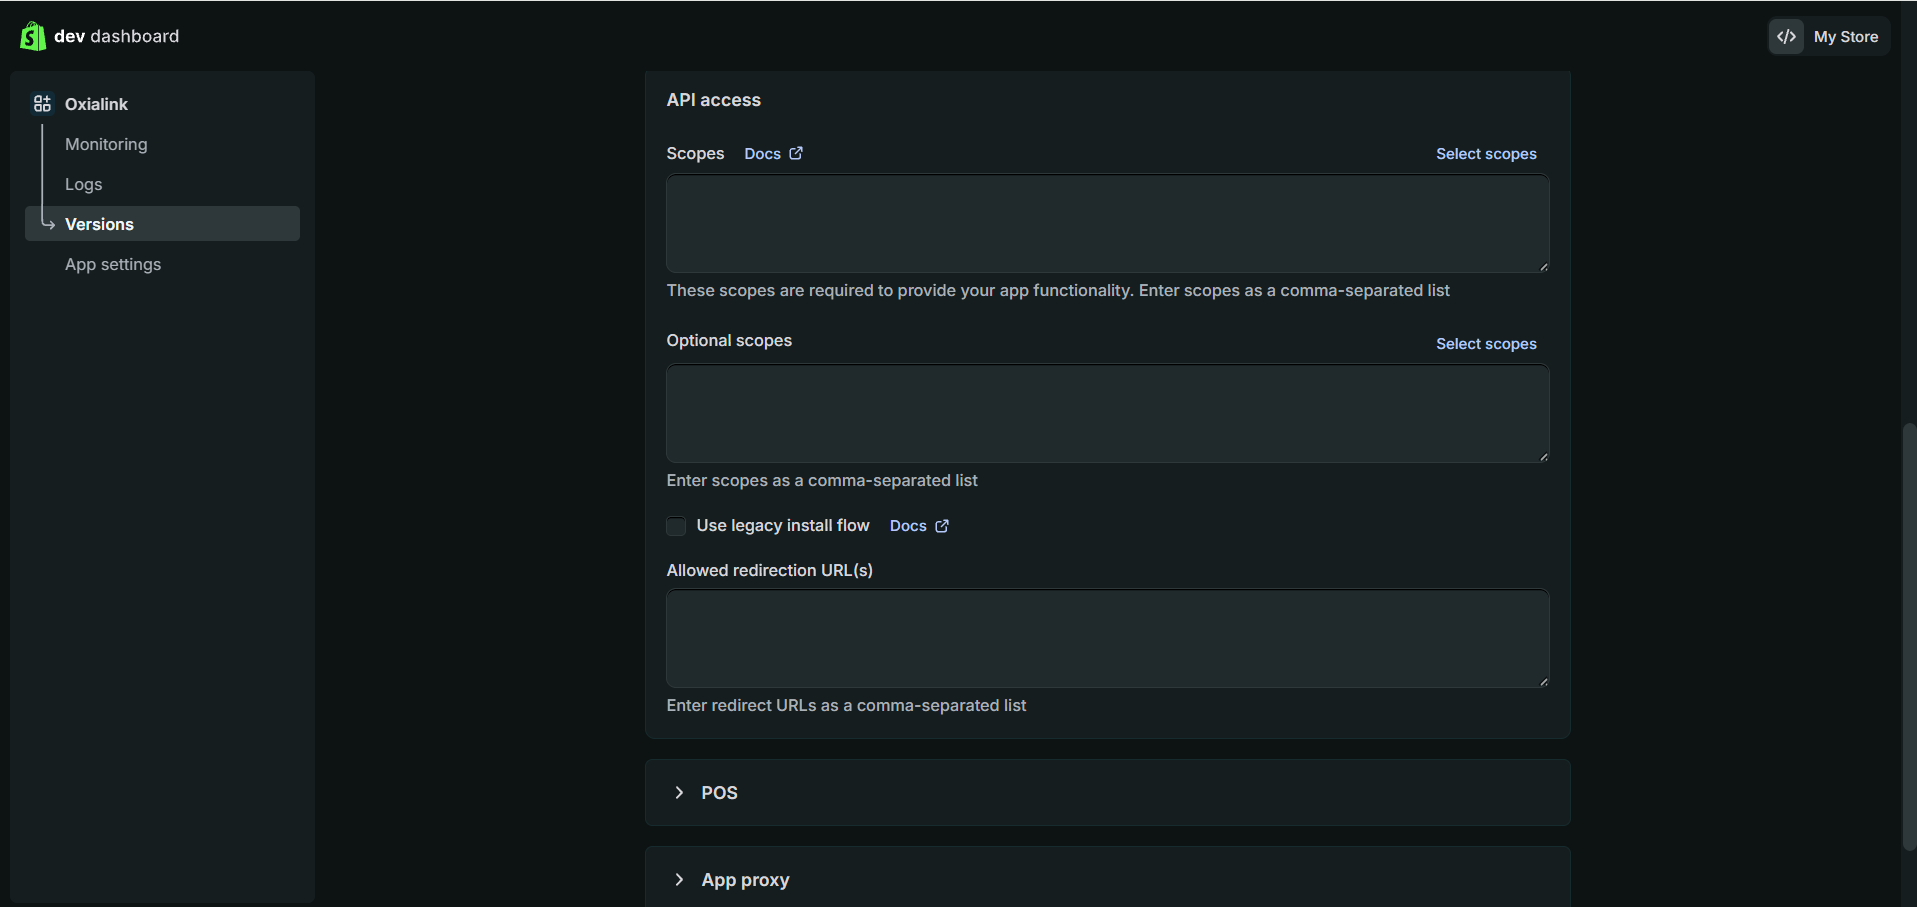
Leave everything else alone, then press Release at the bottom right.
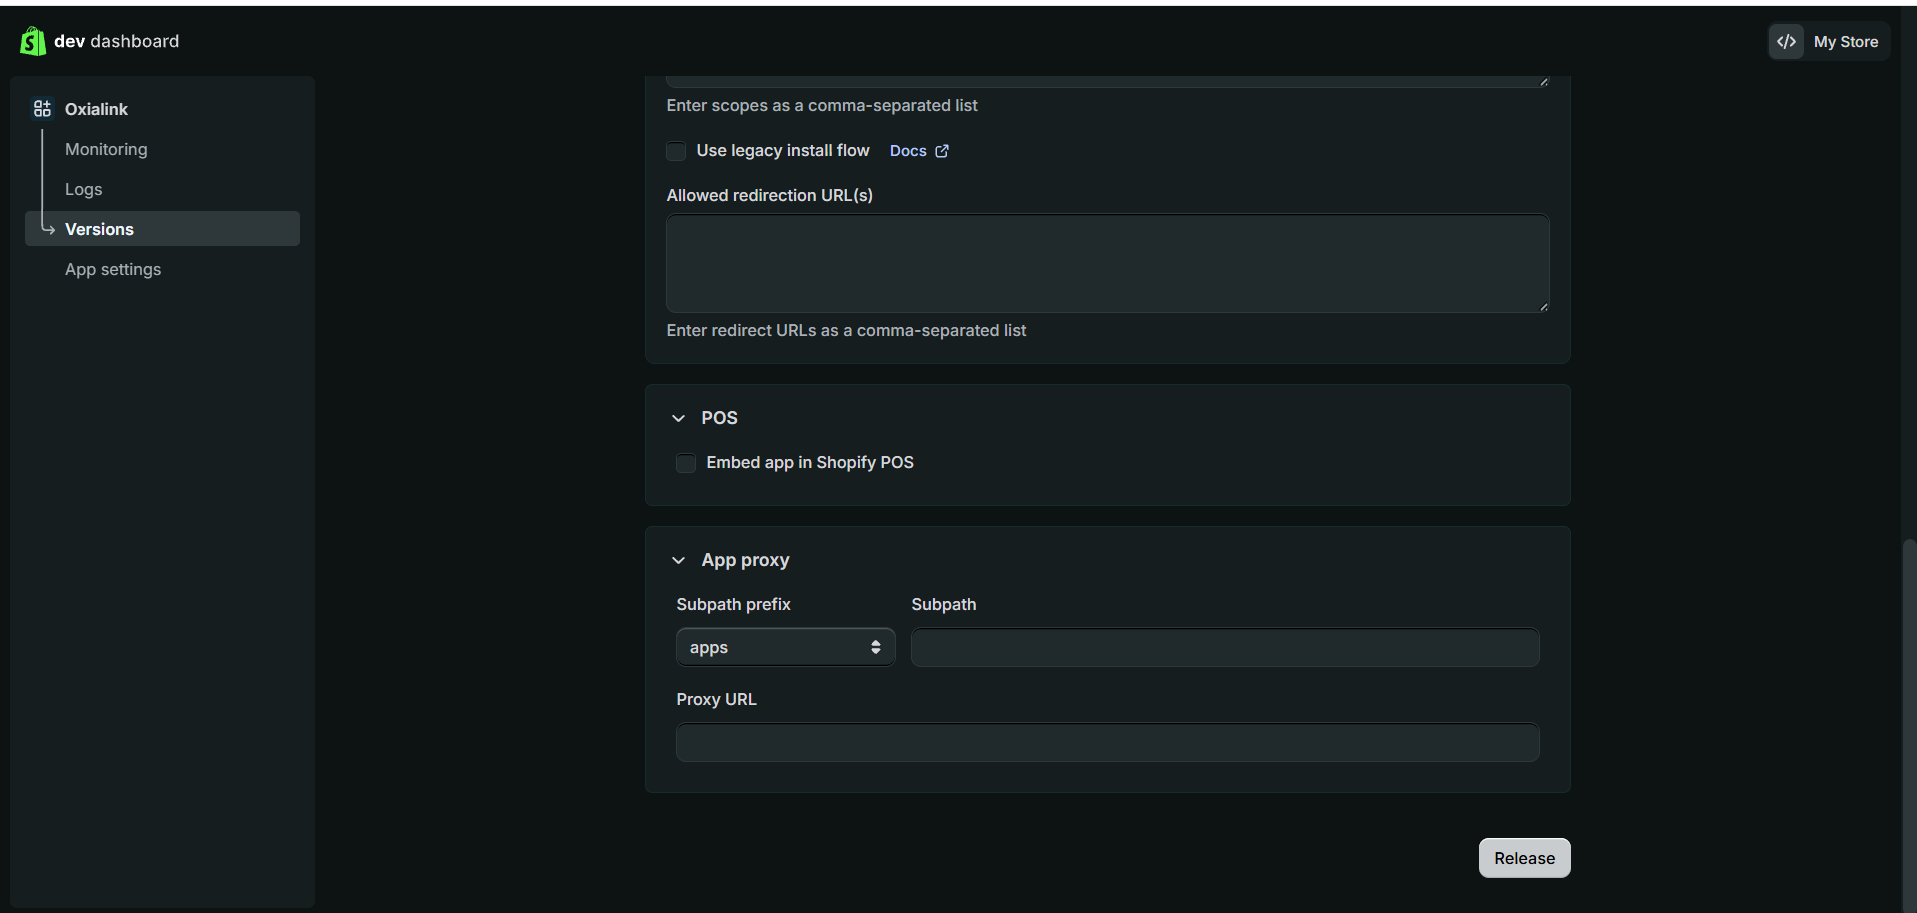
Watch out, twice over. Scopes here are a comma-separated text box, not checkboxes, and searching it for "protected customer data" finds nothing, because that is a category name rather than a scope. read_customers is how you ask for the buyer's email, and without it your orders arrive with nobody to send the link to. Separately: a version you filled in but never released has not taken effect, and that looks exactly like never having set the scopes.
5. Install the app on your store
Click your app's name at the top of the Dev Dashboard sidebar to reach its Overview. Press Install app on the Installs card, choose your store, and approve the permissions.
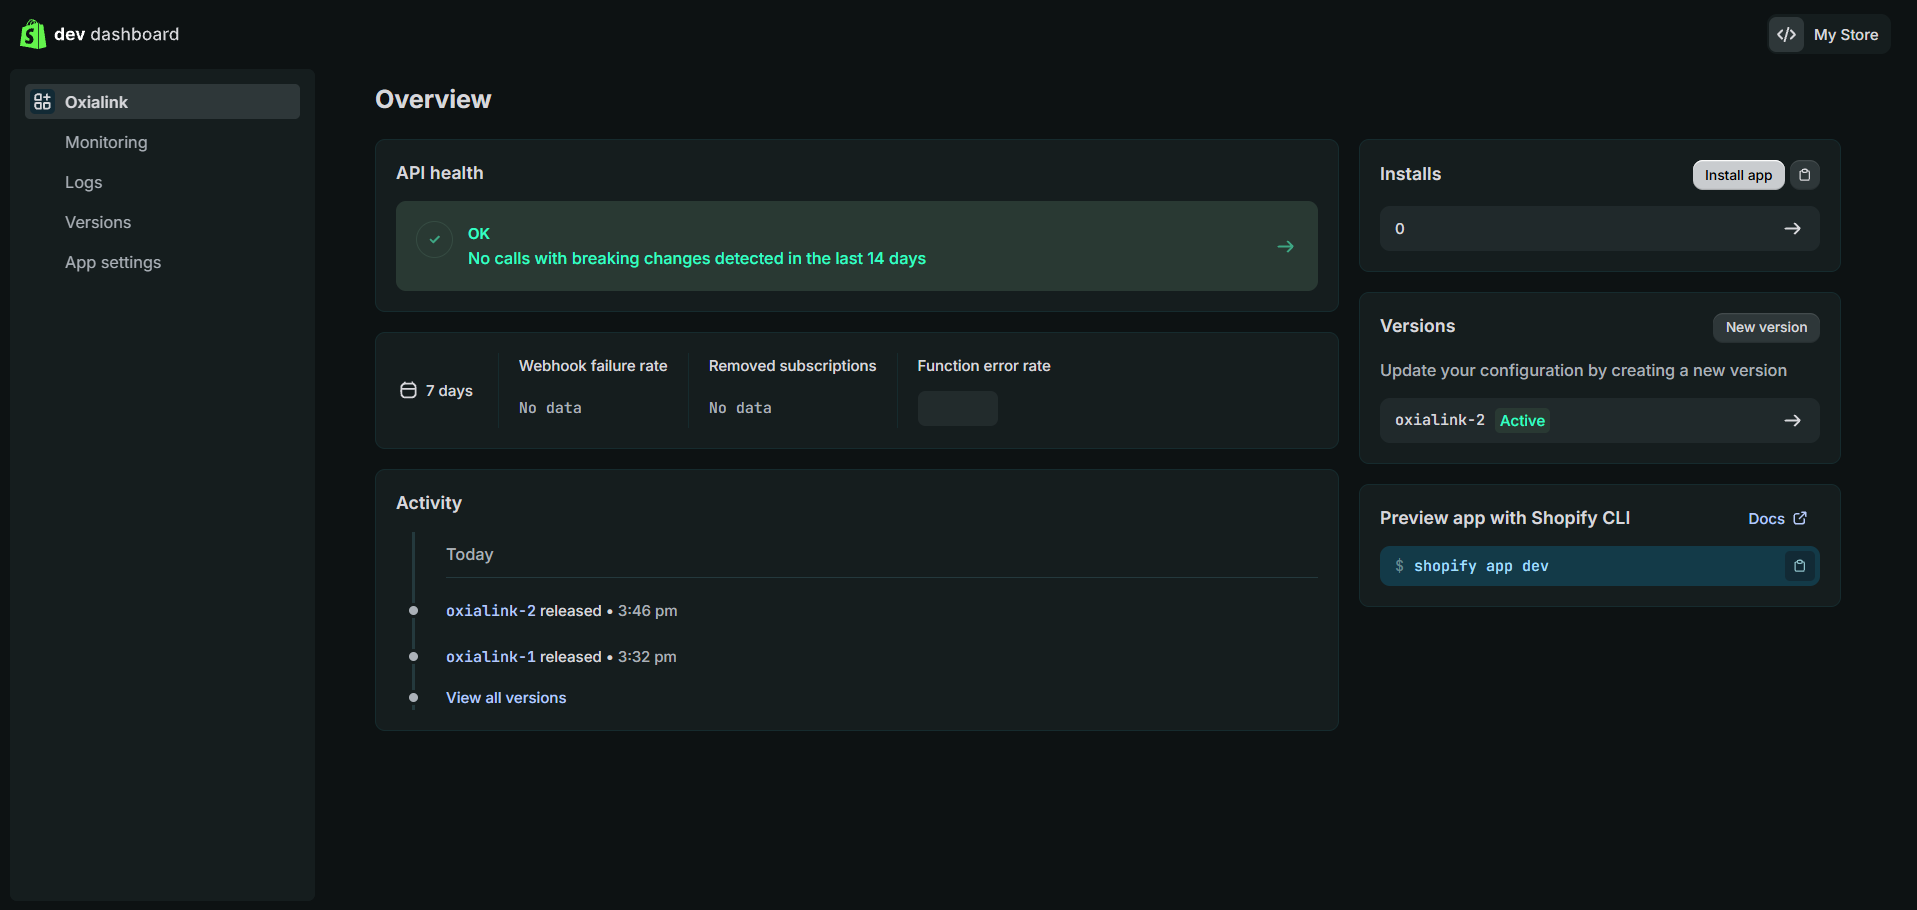
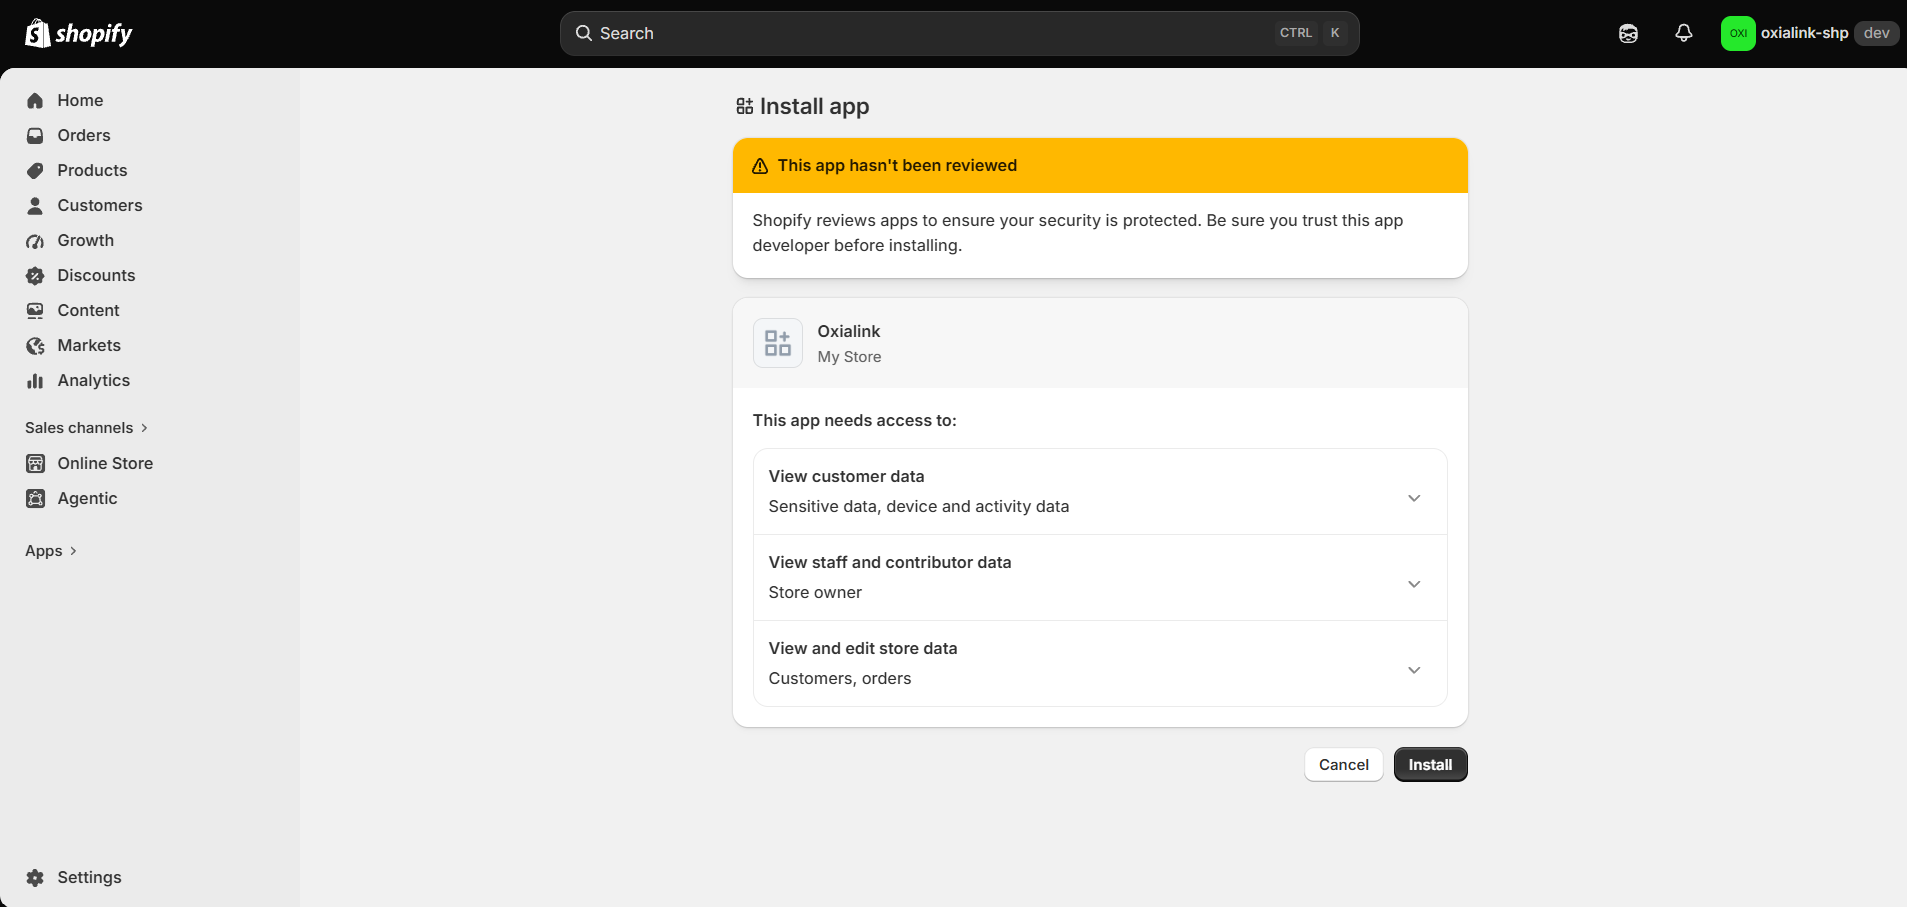
Watch out: this is the step people miss, because nothing asks for it and the app looks finished without it. Shopify will not issue a token to an app that is not installed, and the failure reads 400 - Oauth error invalid_request, which sounds like a typo and is not. Do not look under Stores in the sidebar either; that page only makes dev stores. The Installs count tells you at a glance whether this is done, and "This app hasn't been reviewed" is expected, since you built it yourself.
6. Copy the client ID and secret
Open App settings in the app's sidebar. The Credentials panel holds both. Use the copy buttons rather than selecting by hand.
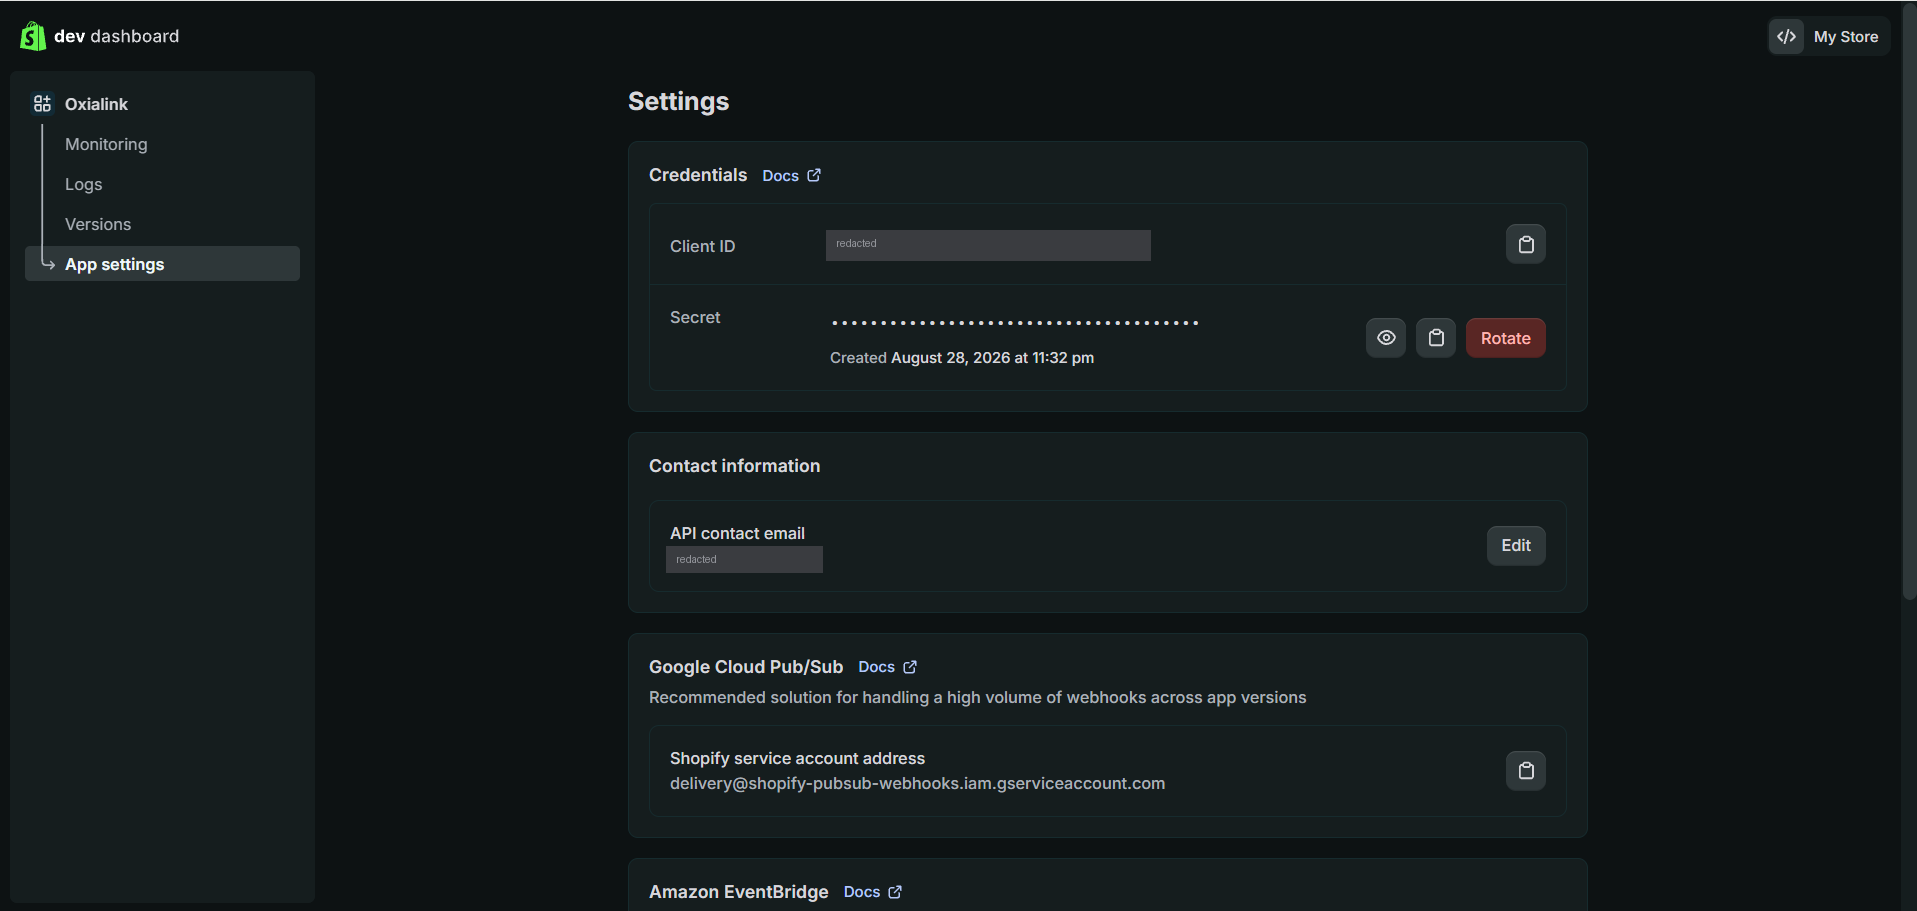
Watch out: there is no long-lived shpat_ token for new apps. These two are exchanged for one that expires every 24 hours, which the gateway handles for you in the background. Copy by button, because a trailing space is a common reason for a refused connection. If you set this up before 2026 and still hold a working shpat_ token, it has not been revoked and Oxialink still takes it.
7. Add a manual payment method at checkout
Shopify: Settings, then Payments, scroll to Manual payment methods, then Create custom payment method. Name it Cryptocurrency (Oxialink), use the instructions field to say a payment link arrives by email, and activate it.
Watch out: the name is load-bearing. The gateway only acts on orders whose payment method mentions Oxialink or crypto, so a method called "Pay with coins" is ignored without a word.
8. Point Shopify's order webhook at your gateway
Shopify: Settings, then Notifications, then Webhooks. Create one for Order creation and one for Order update, format JSON, both pointed at the webhook address shown on your Oxialink Settings page. Copy the signing secret Shopify shows below the list.
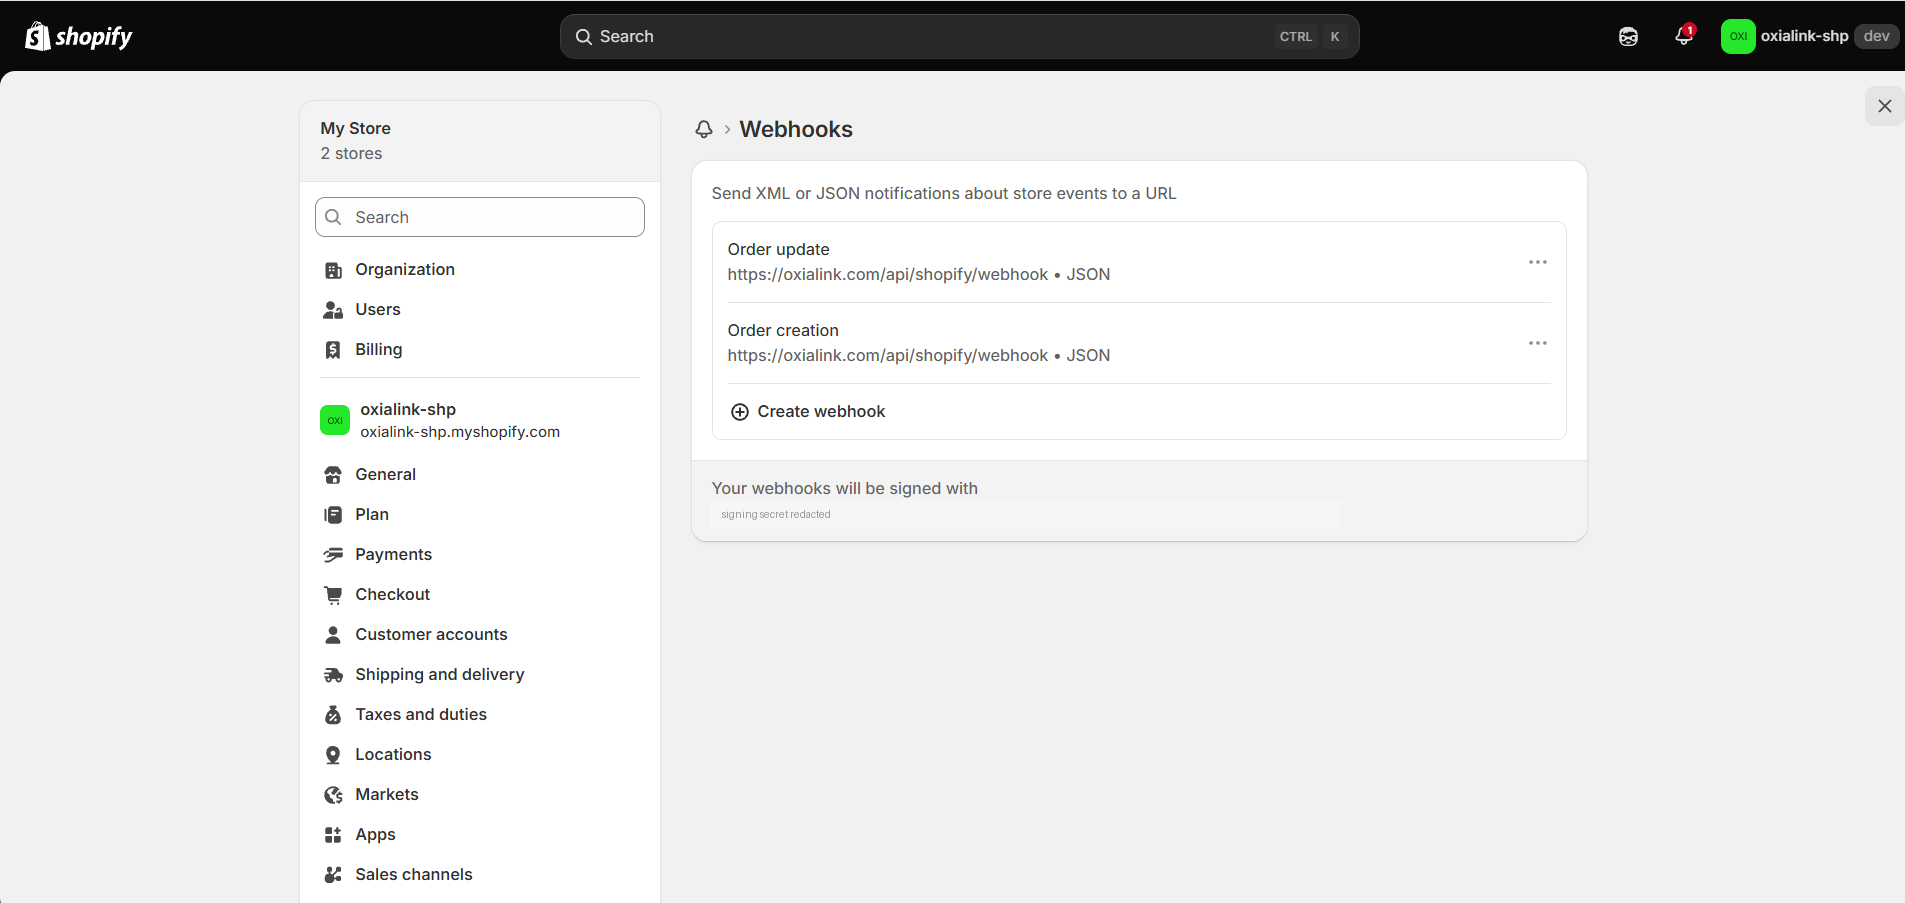
Watch out, twice over. The address has to match the service you are connecting: the sandbox webhook for a sandbox account, live for live. Send it to the wrong one and every delivery arrives at a service that has never heard of your shop. And that signing secret belongs to this store only. If you rehearse on a development store and then set up your real one, the second store has a different secret, and pasting the first has a nasty shape: the app connects, deliveries arrive, and every one is rejected as a forgery.
9. Connect the store to Oxialink
In Oxialink Settings, find the Shopify section. Enter your shop domain (your-store.myshopify.com), the client ID and secret from step 6, the signing secret from step 8, and the coin you made a wallet for. Save.
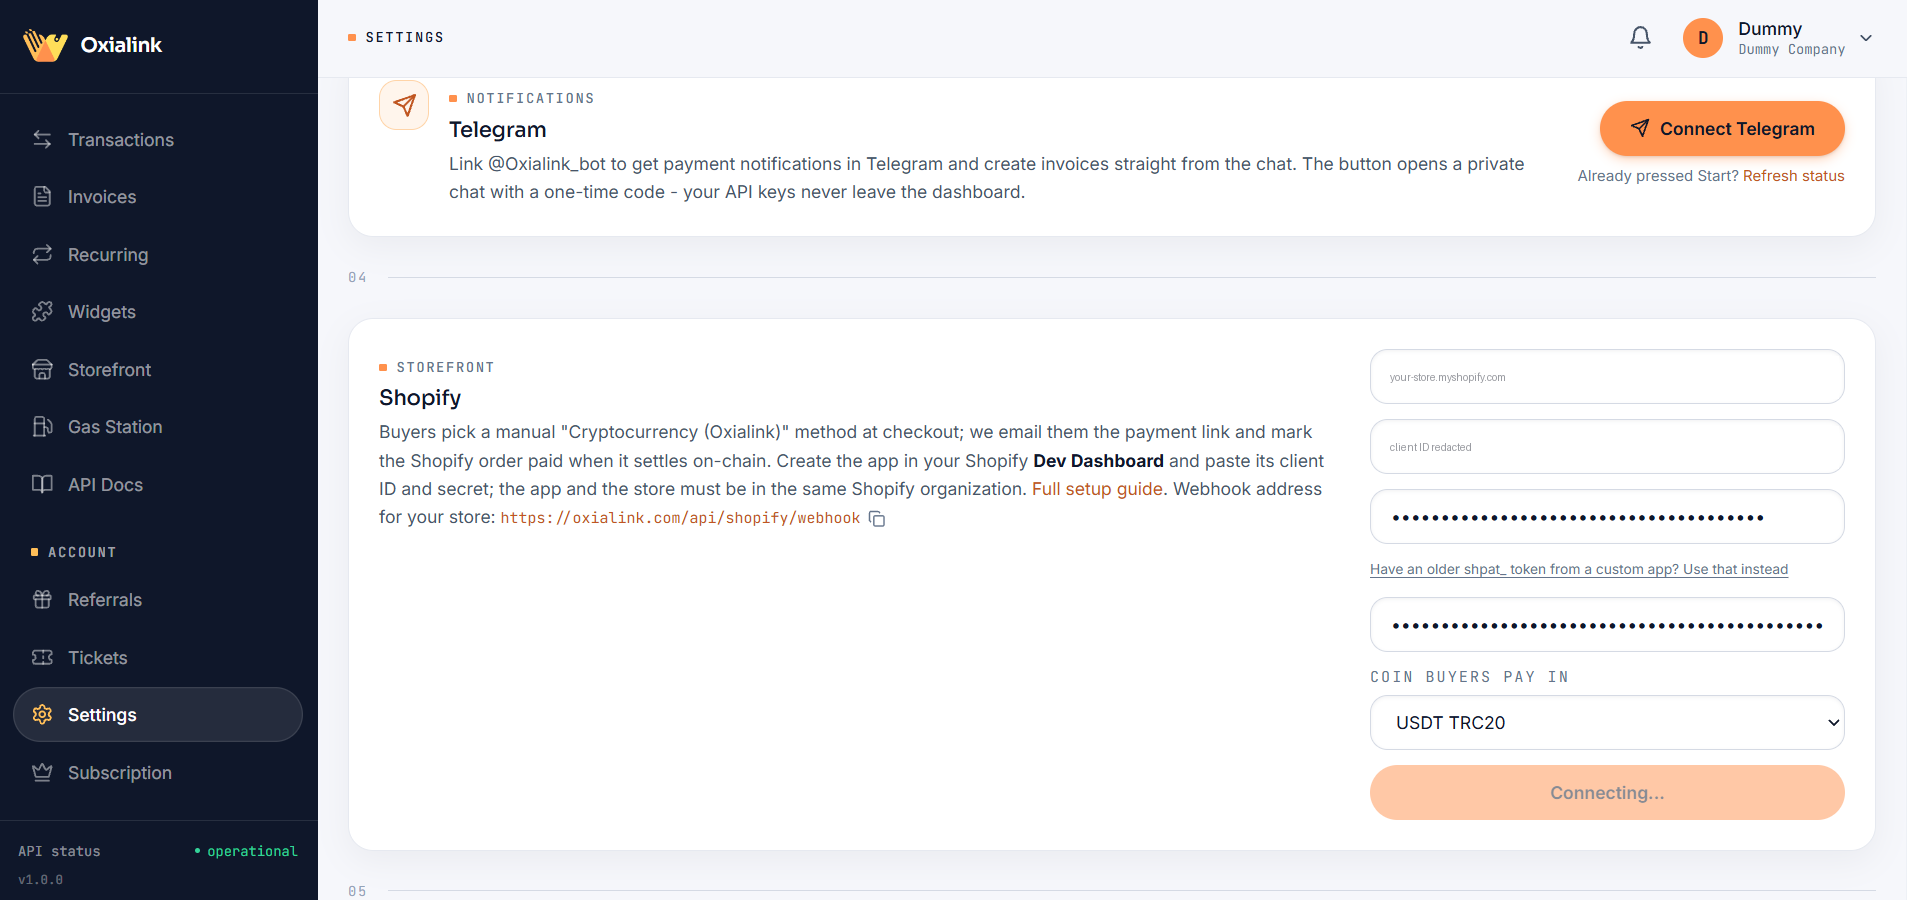
Watch out: if it worked, the page answers with your store's real name, which it could only learn by calling Shopify successfully. If it refuses, the message names the reason rather than leaving you to guess.
10. Place a test order and follow the money
Buy something from your own store and choose the crypto method at checkout.
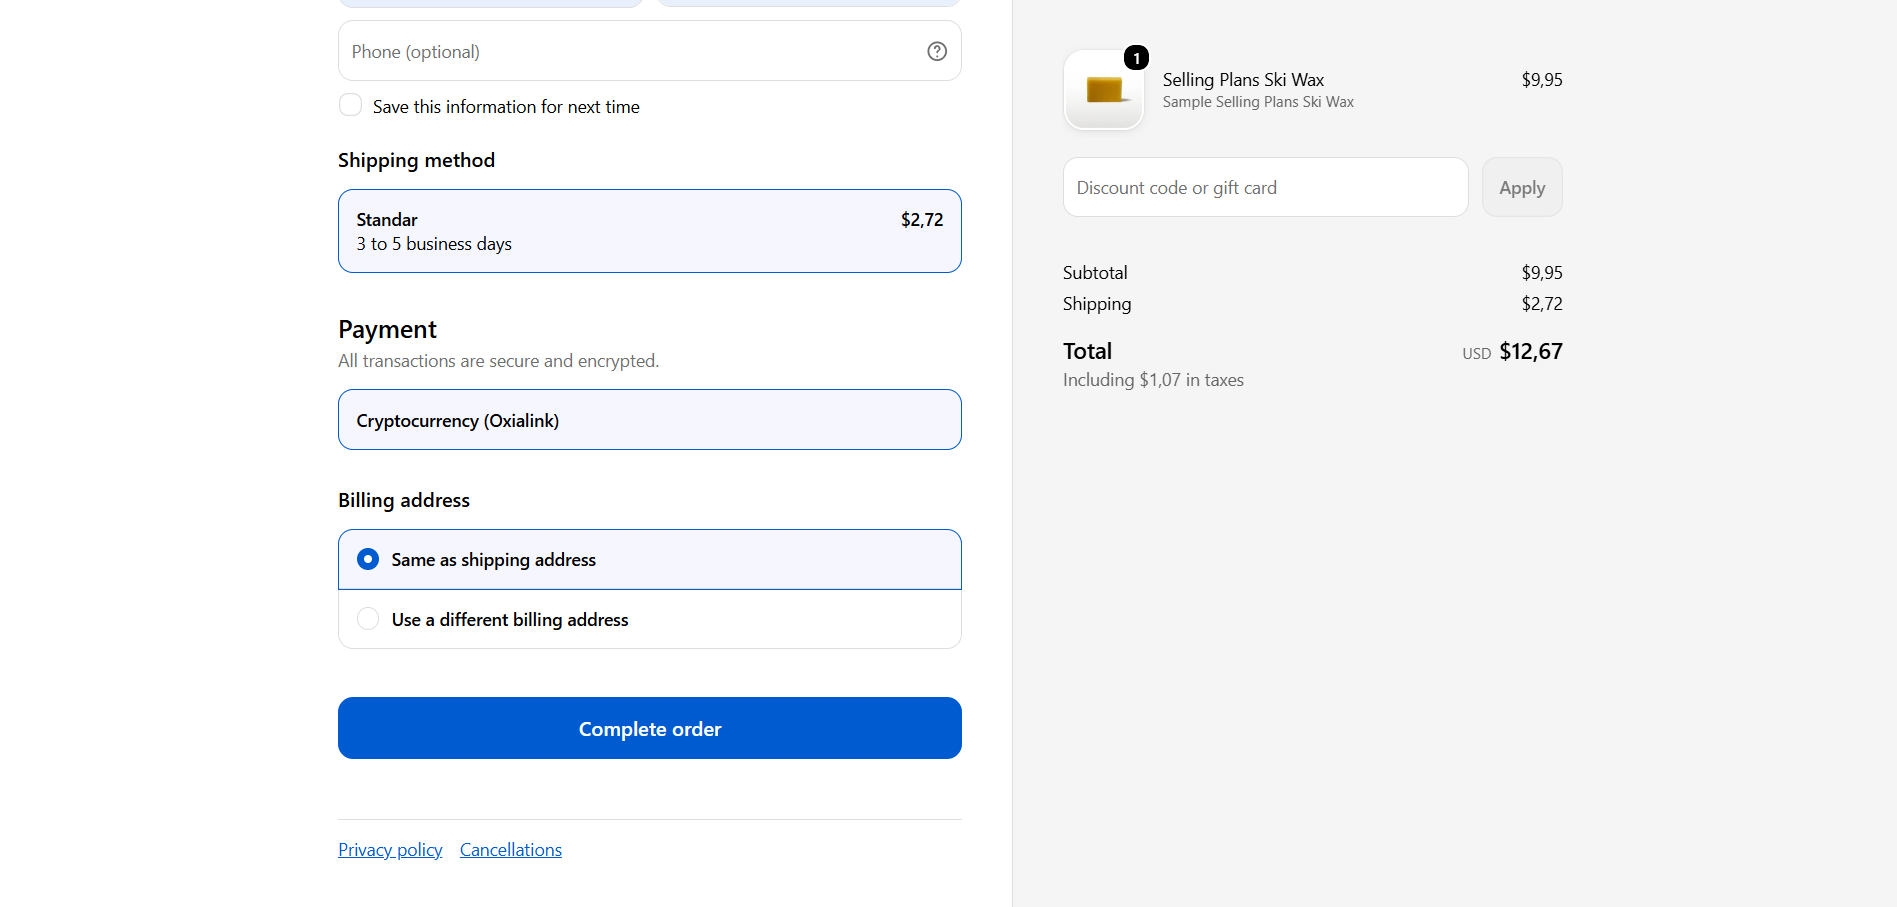
The order is placed unpaid, and the buyer is told a payment link is on its way.
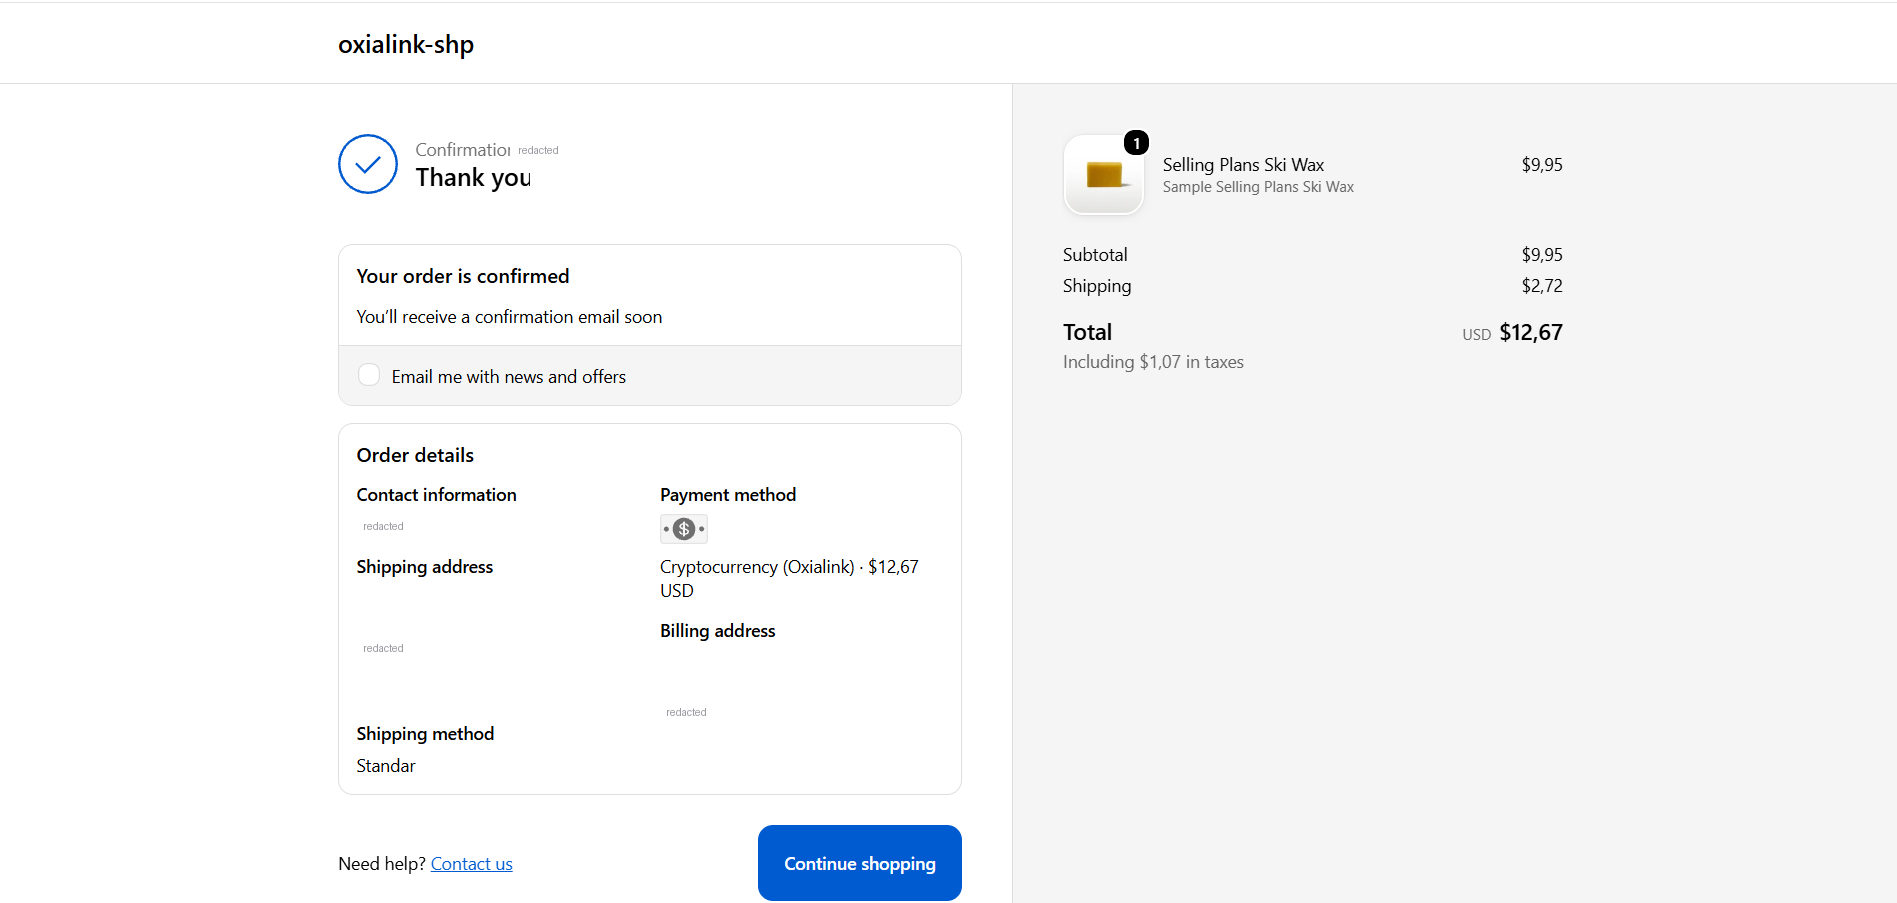
Seconds later it arrives by email, with the exact amount in your chosen coin.
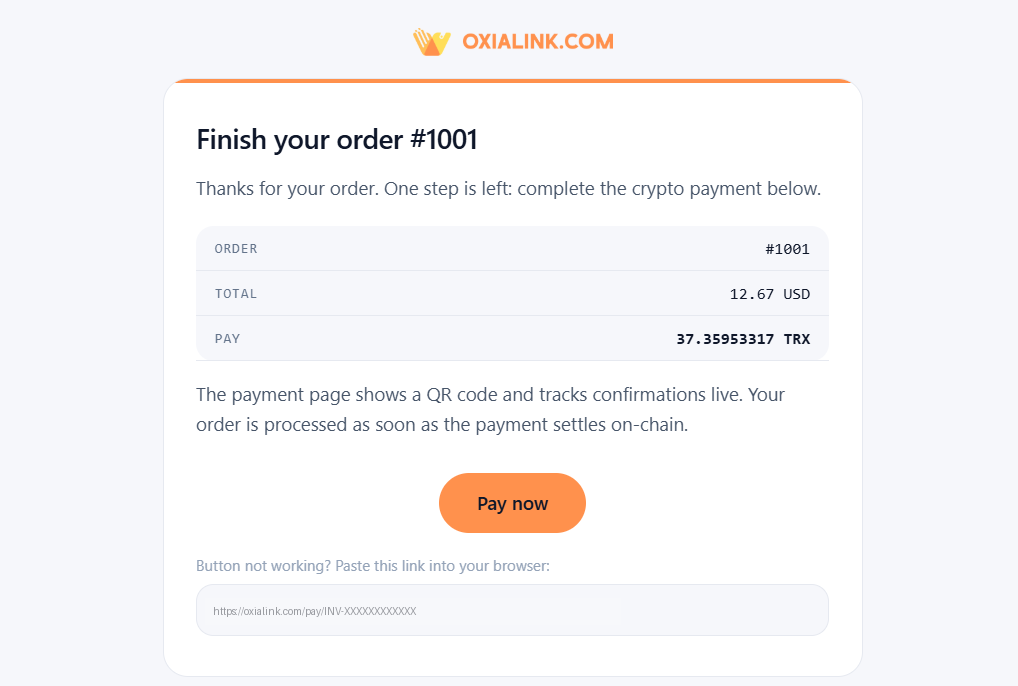
The payment page carries a QR code, the exact amount, and a live confirmation count.
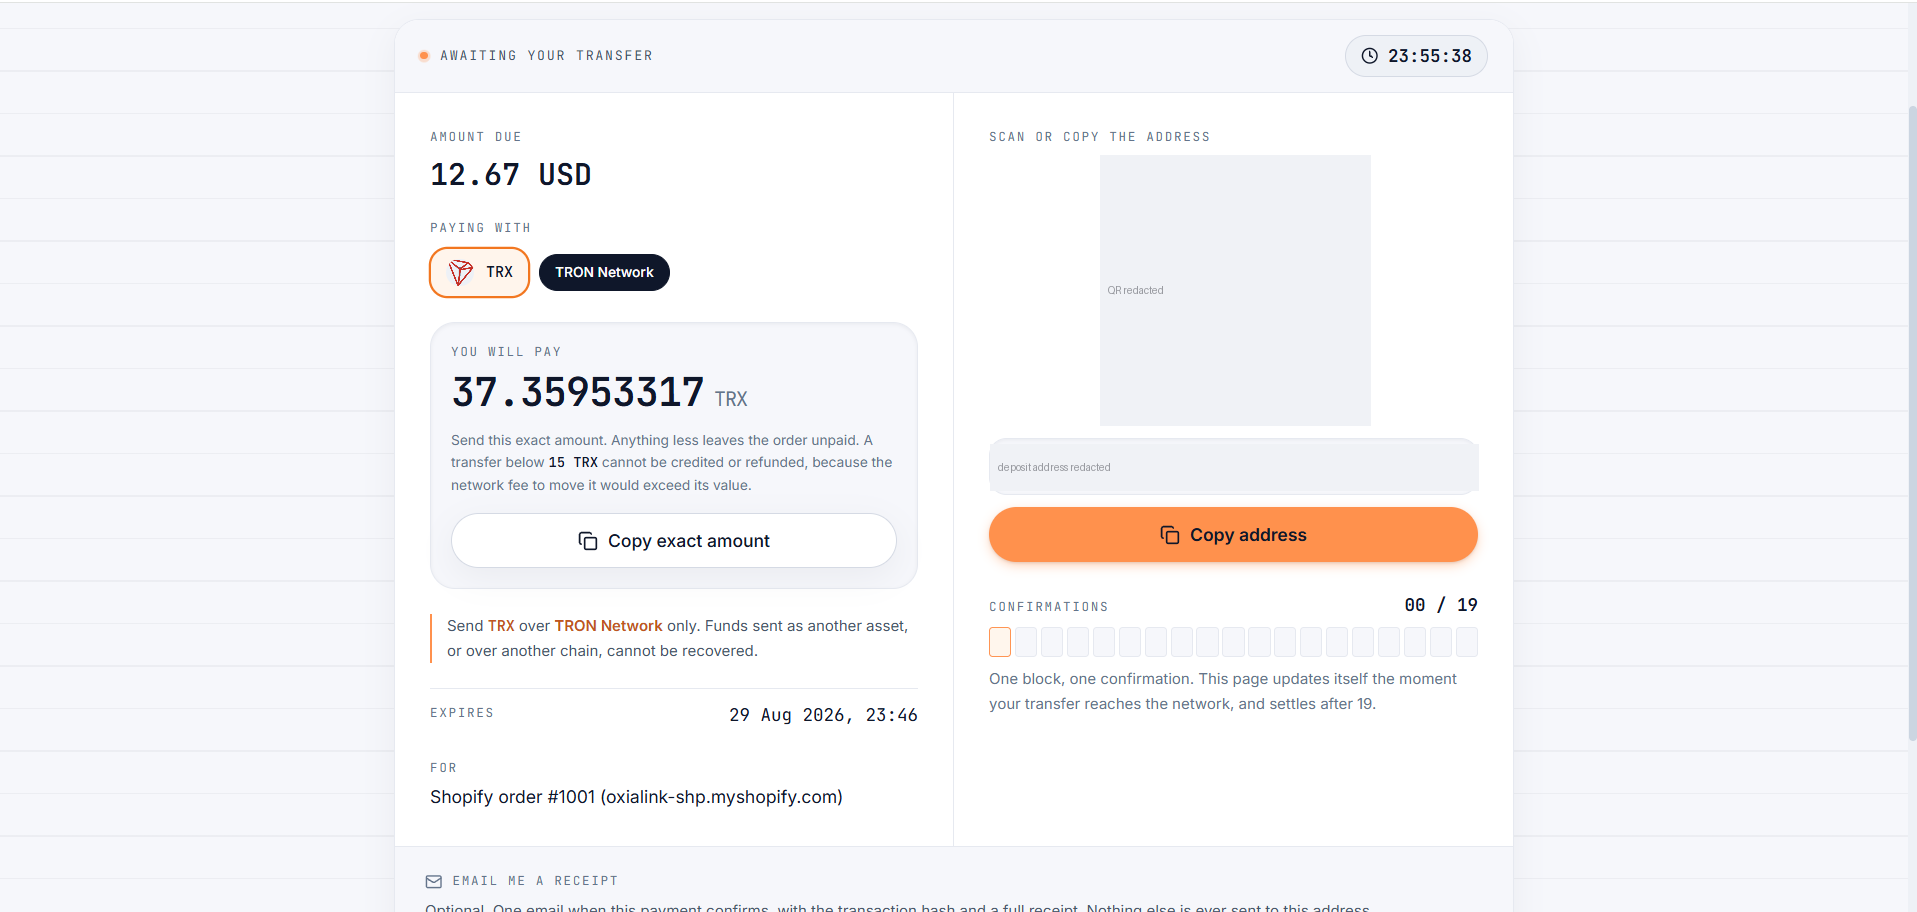
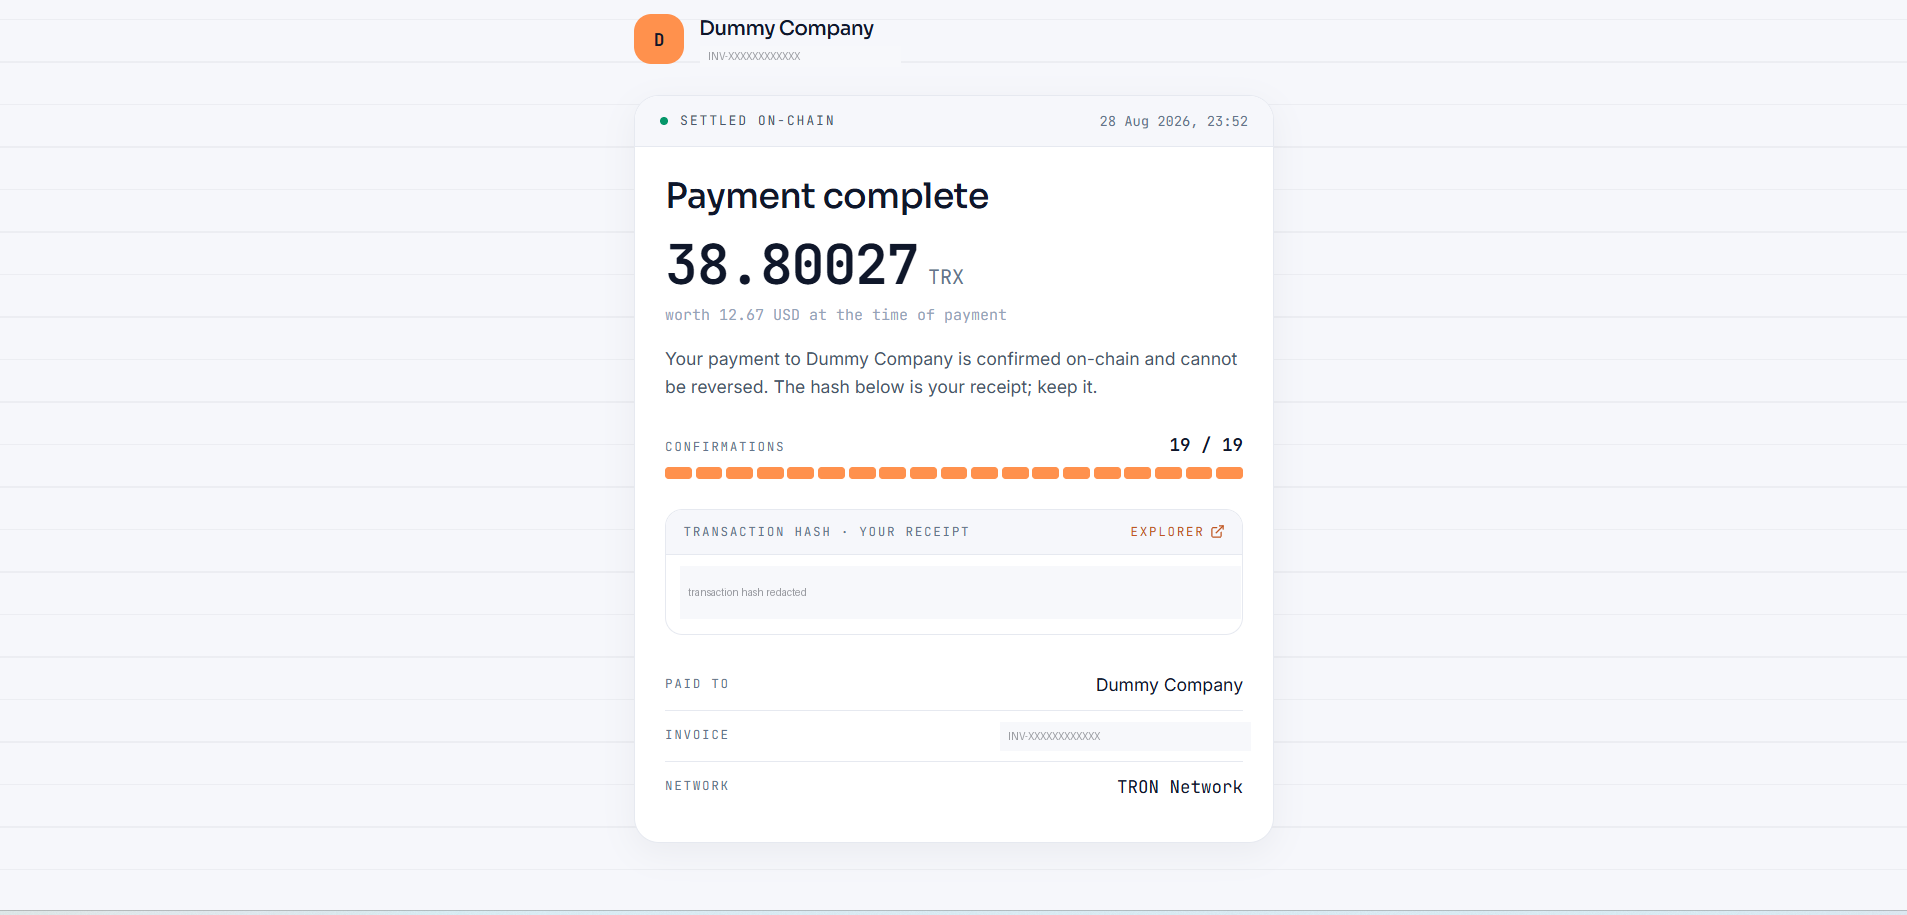
Pay it, and the page settles itself as the chain confirms.
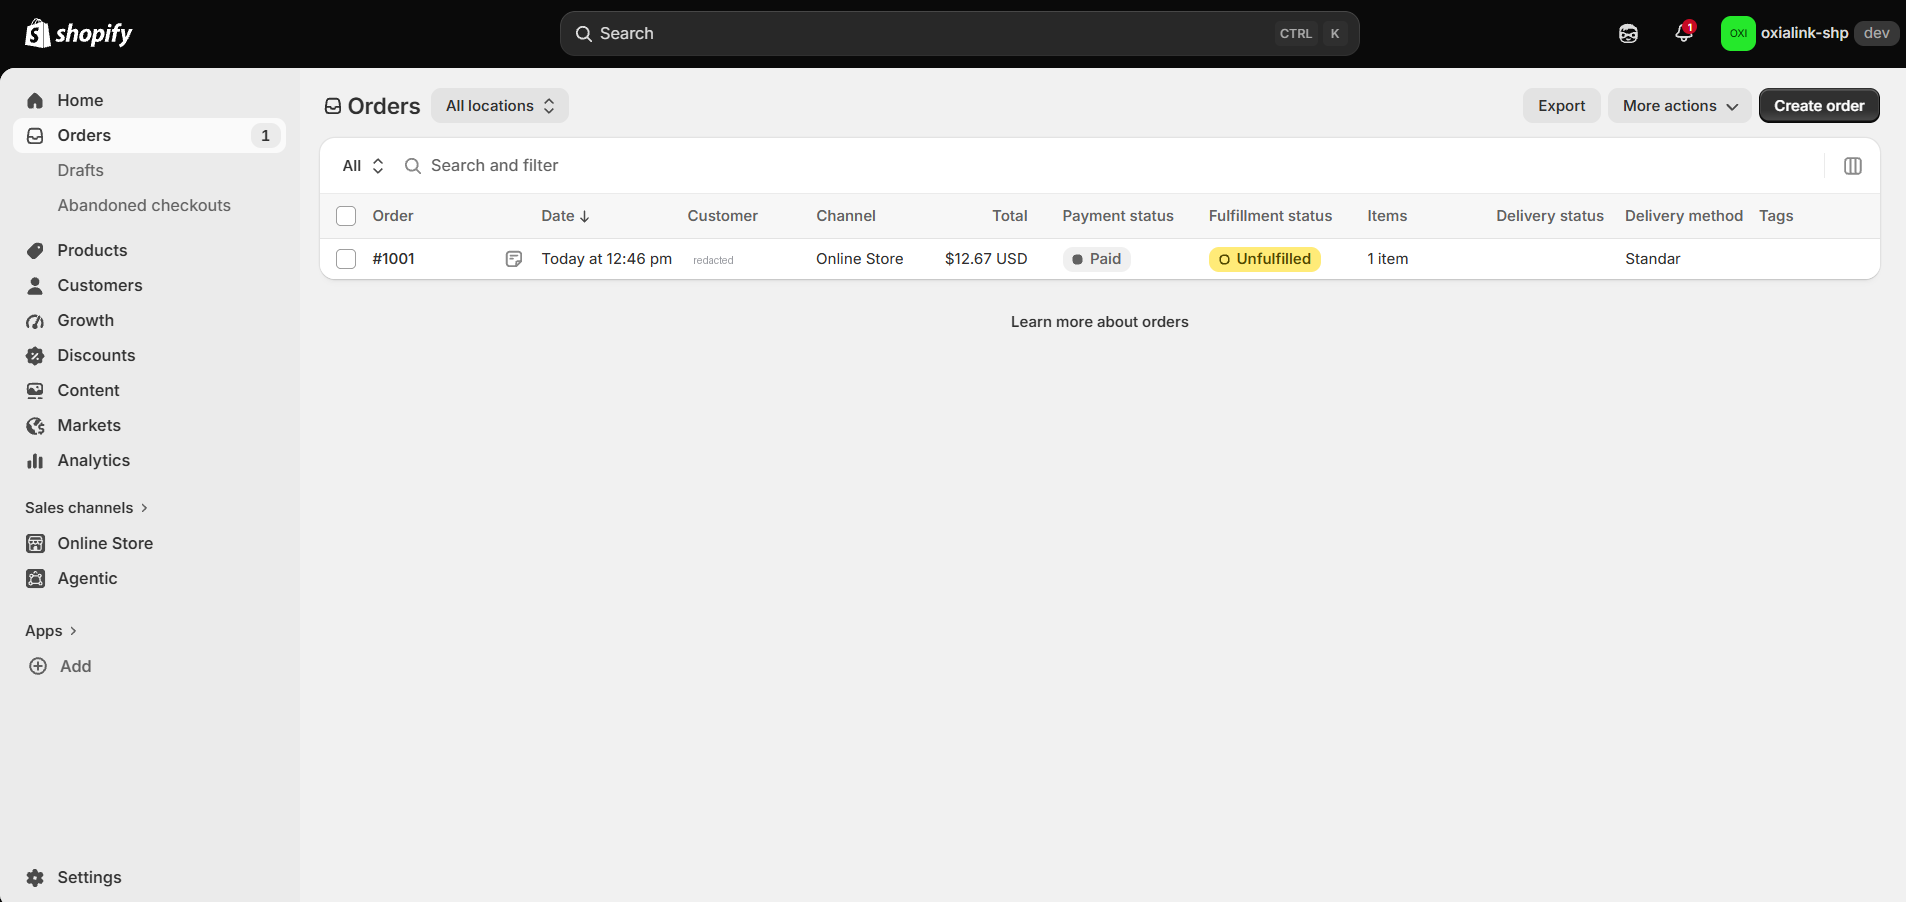
The order then flips to Paid in Shopify, without you touching anything.
Watch out: this is the step people skip and the only one that proves anything. An integration nobody has run end to end is not an integration yet. Run it on the sandbox first if you would rather find out for free.
Why a Shopify crypto payment gateway works this way
Shopify reserves real payment gateway apps for approved payment partners. A gateway outside that list cannot put itself inside Shopify Checkout the way Shopify Payments or PayPal does. That is not a rule aimed at crypto and it is not arbitrary: checkout is the most sensitive surface on the platform, and a payment app misbehaving there breaks the store for everyone on it.
So every Shopify crypto payment gateway uses the same shape underneath: a manual payment method, order webhooks, and a token from a custom app. When a listing promises a native Shopify checkout integration without being an approved payment partner, it is either describing this same pattern in better clothes or describing something that will stop working.
Other platforms do not have this constraint. If you also run a WooCommerce store, the plugin there sits inside checkout properly, and the comparison across platforms is worth a look before you decide where to start.
What it costs you
Worth being clear-eyed, because the app listings tend not to be.
The payment happens after checkout, not during it. Your customer completes checkout, then pays from a link. That is one extra step and one more place to lose someone. There is no way around it without payment partner approval.
The order exists before the money does. An unpaid order is a real order in your admin, your reports and possibly your inventory. Decide deliberately what happens when an invoice expires, because the order simply sits there unpaid and your normal handling has to cope.
Email deliverability becomes part of your payment flow. The link arrives by email. If it lands in spam, your customer concludes the store is broken. Test against the mail providers your customers actually use, not only your own.
None of this is fatal and stores run it every day, but choose it knowing its shape. Our fees are on their own page so you can put a number against the tradeoff.
Which coins to offer
For most stores, stablecoins on cheap chains are the right default. Accepting USDT on Shopify over TRON, BNB Smart Chain, Solana or TON keeps the balance dollar-denominated, so a payment confirming twenty minutes later is worth what it was worth when your customer sent it, and the network fee is cents rather than dollars.
Shopify Bitcoin payments are the ones customers ask for and the ones with the worst checkout experience: confirmation waits on the next few blocks and the fee is whatever the mempool says today. Offer it if your customers want it, but do not make it the only choice.
What you get that cards do not give you
The reason to do any of this is not novelty.
No chargebacks. A confirmed on-chain payment cannot be pulled back by the sender. For digital goods, high-risk categories, or anywhere a dispute rate has been held against you, this is the whole argument.
No underwriting. No merchant account, no rolling reserve, no category review, and no KYC gate on accepting the payment itself.
No single freeze that stops all revenue. A gateway can drop you. The address the money settles to is still yours.
What you do not get is the conversion rate of a one-click card checkout. Both are true at once, and the sensible way to run this is as an extra method alongside cards rather than instead of them.
Frequently asked questions
Can I accept crypto payments on Shopify without installing an app?
Yes, and the ten steps above are exactly that. The manual payment method is built into Shopify, and the app you create in step 3 is your own, built in your Dev Dashboard for your own store and never submitted to the app store. There is nothing to install and nothing to review.
Does this work on Shopify Basic?
Yes. Manual payment methods and custom apps exist on every Shopify plan, Basic included. Nothing here needs Shopify Plus.
How does the order get marked as paid?
The gateway watches the blockchain for the payment. When it confirms, the gateway calls back into Shopify with the credentials from step 6 and marks the order paid. You never mark anything by hand.
What happens if the customer never pays?
The invoice expires, by default after 24 hours, and the order stays unpaid in Shopify for your normal unpaid-order handling to deal with. A payment that arrives short of the amount due is held for review and never marks an order paid on its own.
The connection failed with "Oauth error invalid_request". What is wrong?
Almost always the app has not been installed on the store yet. Creating it, configuring the version and releasing it are three separate things from installing it, and none of them prompts you to do the fourth. Open Stores in the Dev Dashboard, install the app on your shop, and connect again. The same error can also mean the app and the store are in different Shopify organizations, which the Dev Dashboard URL will tell you: the organization id sits in the address.
Nothing happened after my customer checked out. Where do I look?
Two causes account for almost all of it, and both are silent from the admin. Either you have no wallet for the coin the store is connected to, so there is nothing for the payment to settle into and no invoice is ever raised - that is step 2, and it is the one people do last. Or the webhook is pointed at a different service than the one you connected: if you are testing on the sandbox but the webhook still says the live address, every delivery arrives somewhere that has never heard of your shop and is refused. Check the wallet first, because it takes ten seconds.
Why did my customer not receive the payment link?
Almost always one of two things: the read_customers scope from step 4 was never granted, so the order reached the gateway with no email address on it, or your outbound email is not configured and nothing was sent. The payment link is written onto the Shopify order either way, so you can always send it yourself while you sort out the cause.
Can I test all of this before taking real money?
Yes, and you should. The sandbox runs the same code against public test networks, with faucets that hand out coins in under two minutes. A webhook signature that verifies there verifies in production, because it is the same signing function running on both.
Do I need to know anything about blockchains to add crypto payments to Shopify?
No. You need an email address, a Shopify store, and the patience to follow ten steps once. The gateway handles addresses, confirmations and exchange rates. The one thing you do decide is which coin you want to hold, and step 2 is where you decide it.
That is the whole procedure. If you would rather see what the finished integration looks like before building it, the Shopify crypto payment gateway page walks through it from the merchant's side, and the API documentation covers what happens underneath for anyone who wants to check the plumbing before trusting it with real orders.
Get started
Start accepting crypto today
Email address, password, first payment in under fifteen minutes.